Go ahead and clean the transmission casings. Get as much of the old oil out as possible. You can do this with various substances. Carburetor cleaner works well. I try to avoid brake cleaner so that I don’t get any on the bearings. I had very little oil left in this transmission when I opened it up, so I didn’t even bother this time. Beyond that, you can pry out the magnet with a flathead screwdriver and wipe it off – if anyone has a great way to clean a magnet, please tell! Also, scrape off the old gasket sealer on the mating surfaces of both transmission case halves. Razor blades or gasket scrapers work well. Just be careful not to gouge the mating surface much with the blades. Then wipe it off with the carb cleaner and paper towel to keep it clean and dry.

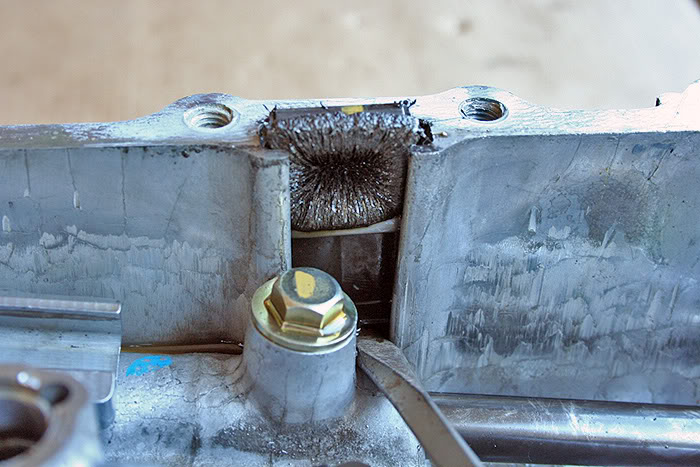
Another thing to look out for which may hinder the sealing of the case halves are scores that may need filed down. Mine did have some damage, highlighted in orange, which I filed down and wiped down.

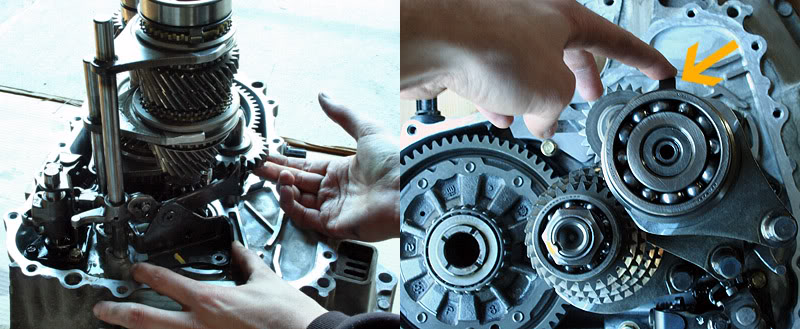
With that done, we can get back to reassembly. Put the differential back in. Next, align the gear clusters with the shift forks like so, and reinstall them in the bell housing.
NOTE: This is a billion times easier with two people, as it can be quite difficult to both hold the gear clusters and turn the differential if the countershaft’s final drive pinion gear is having trouble lining up with the final drive ring gear of the differential.
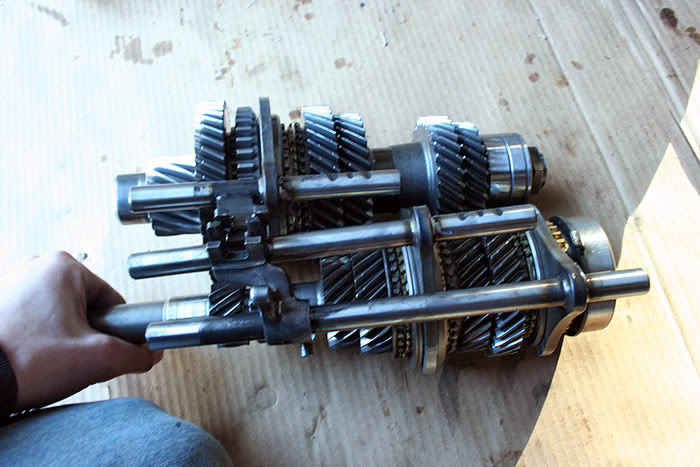
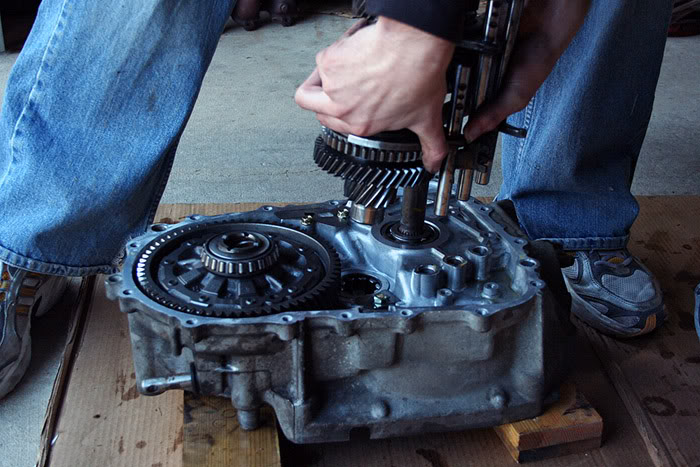
Once complete, install the shift change assembly and the reverse idler gear. Make sure that the shift rod in the casing is in neutral, as well as all three shift forks. In neutral, the shift assembly will drop down into its place in the casing. Just maintain upward pressure of the shift forks with right index finger and downward pressure on the shift change assembly’s alignment rod with your left thumb, as seen in the right photo. Once in, reinstall the three 10mm bolts. Only tighten them gently by hand, as they can be easy to strip out. In the left photo, you can see the pin on the reverse idler that needs lined up with the slot in the transmission casing.
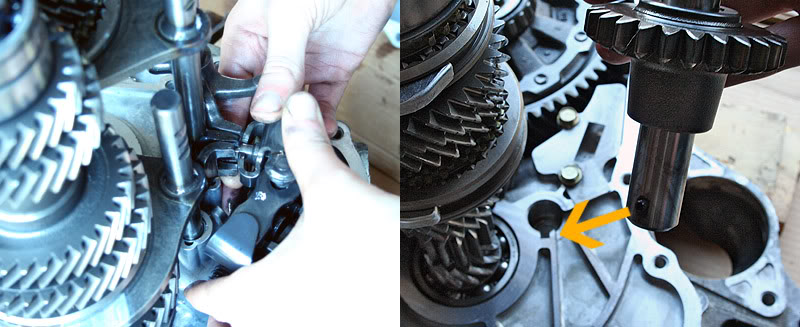
Next, place the reverse change holder in its place, aligned with the 5/R shift fork and the reverse idler gear. Thread its two 10mm bolts in gently by hand. Finally, make sure to move the alignment tab of the mainshaft washer to roughly the 12 o’clock position – you can see where this tab locates in the upper casing.
NOTE: Before spreading the gasket sealer on the mating surface of the bell housing, it may be helpful to run through closing the transmission case once or twice if it is your first time. This may help eliminate any surprises and resulting frustrations. As much as I have done this, I still hit snags every so often. I had a differential bearing with a slight burr prevent the casing from falling down completely. I spent about thirty minutes looking for the problem before finding it, and by that time the gasket sealer was spent.
Comfortable with the next few steps, go ahead and spread the gasket sealer. I strongly recommend Honda Bond, as that stuff is probably used to seal cracks in the Hoover Dam, but I’ve used almost all variations of RTV Sealant (gray, blue, red, black) with great results. Yes, I was being cheap.
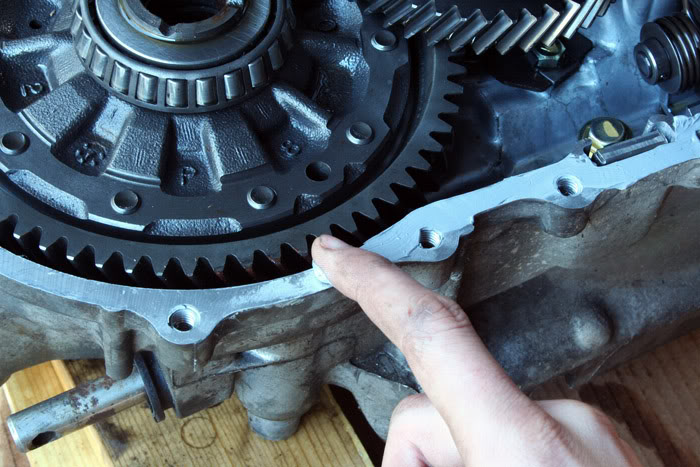
Once you have gasket sealer spread all around the mating surface of the bell housing, go ahead and slide the upper casing down over the gear cluster, making sure you don’t bump the tab you aligned at 12 o’clock. The picture on the right shows the “thumbnail” gap that you’ll normally see when the case bottoms out on the shift change assembly’s alignment rod.

The easiest way I’ve found to drop the case further down is to use a Phillips screwdriver and use it to select various gears in the transmission. I’ll normally go for 2nd to 1st, and then 4th to 3rd. At the same time you perform this, it may be beneficial to press down gently on the top of the case, although not required. The casing will drop down almost immediately as long as nothing is preventing it.

I’ve never been able to just spread the c-clip at this point and tap down on the casing to get the c-clip to seat, like some people claim. You can try this, though, to see if you find success with it. Instead, I thread four 12mm bolts (highlighted in pink) into the corners of the casing “finger tight”. Once this is done, I spread the c-clip (this time with a set of pliers I finally found instead of the two screwdrivers at the beginning of this tutorial). If the c-clip will not spread and stay open, thread the bolts down a bit further with a ratchet, but be careful that the c-clip is not being bent or damaged on the countershaft bearing.
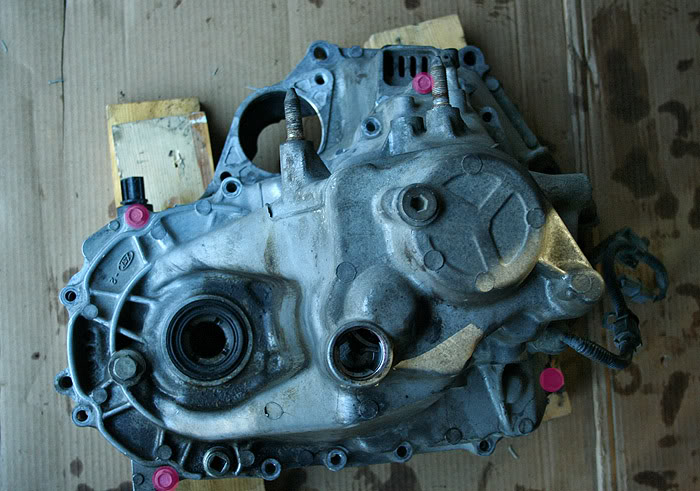

Once the c-clip stays open, I pick the case up, flip it over, and drop it gently against a surface. To put the least stress on the transmission, and prevent any damage to the aluminum casing or internals, it is advised to drop the casing on to something that can absorb any impact - i.e. thick phone book, block of wood, etc. Also, sometimes it is possible to simply do this process in the air, without dropping the transmission. The weight of the countershaft will then cause the countershaft to slip down into the c-clip and lock it into the bearing’s guide for the c-clip. Like the noticeable “clunk” when you first opened the c-clip and dropped the countershaft, you will hear another noticeable “clunk” when the countershaft falls into place.
NOTE: If you didn’t clean out the oil in the casing, you may want to consider flipping the case over so that the bottom side of the transmission (the side which faces the ground when installed in the car) never faces downward. This will prevent any oil from seeping out through the gap between the two case halves where the gasket sealer is required to absolutely get a proper seal. Remember, gravity pulls down, so you want the best seal possible at the bottom and sides of the transmission, where the oil spends the majority of its life, sitting overnight and what not. This is easier if you just clean the oil out, though.
Flip the transmission back over and observe the c-clip. Make sure it is in properly.

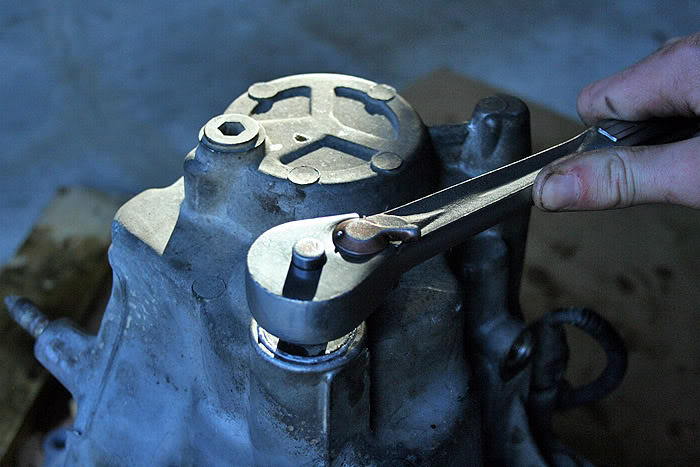
Reinstall all of the 12mm bolts that hold the transmission halves together and torque them down to 20 lb.-ft. in a crisscross manner, starting from the middle and working your way out and around. Be sure to pay attention to any brackets that need to be installed with these bolts. These bolts will strip fairly easily if over-tightened. As a general rule, “hand tight” with a 3/8” ratchet will suffice and normally prevent any stripping. Reinstall all remaining pieces in whatever order you choose. It is a good idea to put sealer on the c-clip bolt’s threads. You can stay clean by using a ½” extension to install it and thread it in. It will torque down to 18 lb.-ft. Again, “hand tight” will work fine if no torque wrench is available. Over-tightening this can result in cracking the transmission casing itself. So be careful. The 14mm reverse idler shaft bolt is actually pretty tight. 33 lb.-ft. is recommended, “hand tight” on the tighter side works fine. Again, torque wrenches are always good insurance.
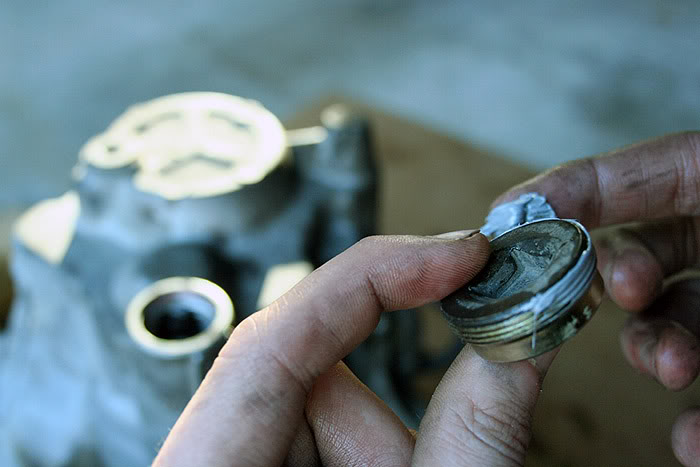

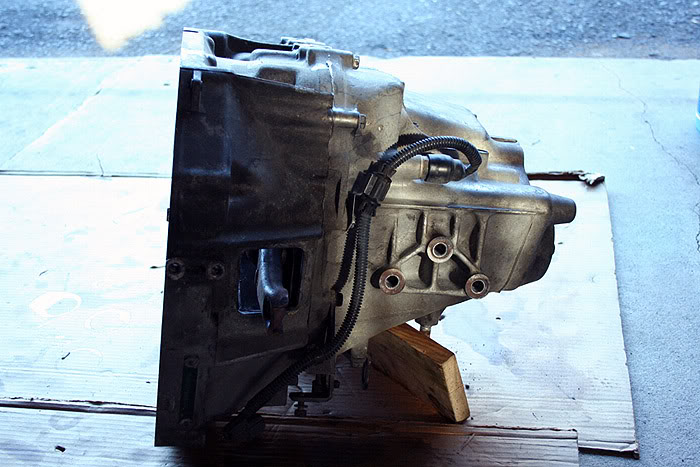
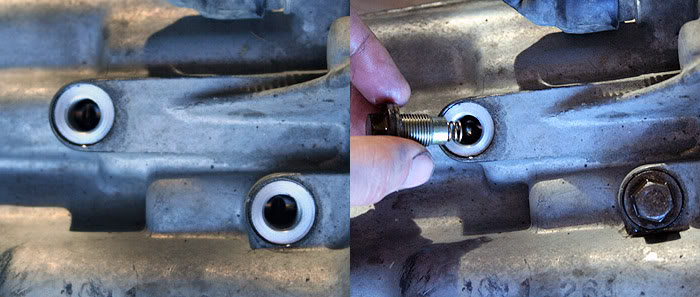
You can thread the two 12mm bolts in to the casing which contain the shift fork springs and balls now, as well. I have found though, that putting them in with the transmission vertical can sometimes lead to problems with shift fork movement (I have jammed two shift forks this way in such a fashion that it would not move out of neutral when pushing the shifter). Instead, I have found it easier to install these with the transmission’s bottom facing upward. Prop it up with a board, and then drop the balls into the holes. Thread in the two bolts with the springs and lightly tighten them (these strip INCREDIBLY easily). I think 12 lb.-ft. is required. Try whichever way you wish, but this way has worked flawlessly every time for me.
Go ahead and flip the transmission back over, test the motion of the mainshaft by spinning it several times both ways. Use that Phillips screwdriver to row through the gears, making sure the mainshaft still spins in each gear.
Congrats, you’re finished!